Author Topic: 71 rebuild  (Read 317464 times)

0 Members and 11 Guests are viewing this topic.

Offline Scott

  • Tri Powered
  • ****
  • Posts: 419
  • Shed Dweller
  • Location: Gold Coast
Re: 71 rebuild
« Reply #520 on: July 14, 2015, 08:39:52 AM »
Brad No!

I think i saw a silicon spot,  top D/S, rear quarter pillar,  just below the roof turret  :banghead: Craig can you see it ????

I see something that looks like an aerial hole but that's it. 

Did you dry or wet sand it?  I'd have thought 800 would be a bit rough for clear, but I'm no expert.

Offline wabco40

  • Fuel Injected
  • *****
  • Posts: 556
  • Location: Perth
Re: 71 rebuild
« Reply #521 on: July 14, 2015, 10:27:25 AM »
I see something that looks like an aerial hole but that's it. 

Did you dry or wet sand it?  I'd have thought 800 would be a bit rough for clear, but I'm no expert.

Jethro's just taking the p#iss Scott, its just a light reflection. Having said that it has its fair share of defects. Yes, it still has the antenna hole.

It was wet sanded. I was going the start with 1200 - 1500 but was advised that starting with too fine a paper will not cut off the high points but rather round them over. The 800 will flatten the surface but you need to know when to stop and also keep away from the edges. Next comes the time consuming part of sanding out the 800 scratches.


Offline Scott

  • Tri Powered
  • ****
  • Posts: 419
  • Shed Dweller
  • Location: Gold Coast
Re: 71 rebuild
« Reply #522 on: July 15, 2015, 08:14:39 AM »
I did notice you've kept away from all the sharp lines.  It'd only take a second to burn through the clear in those areas. 


Offline wabco40

  • Fuel Injected
  • *****
  • Posts: 556
  • Location: Perth
Re: 71 rebuild
« Reply #523 on: July 25, 2015, 06:23:29 PM »
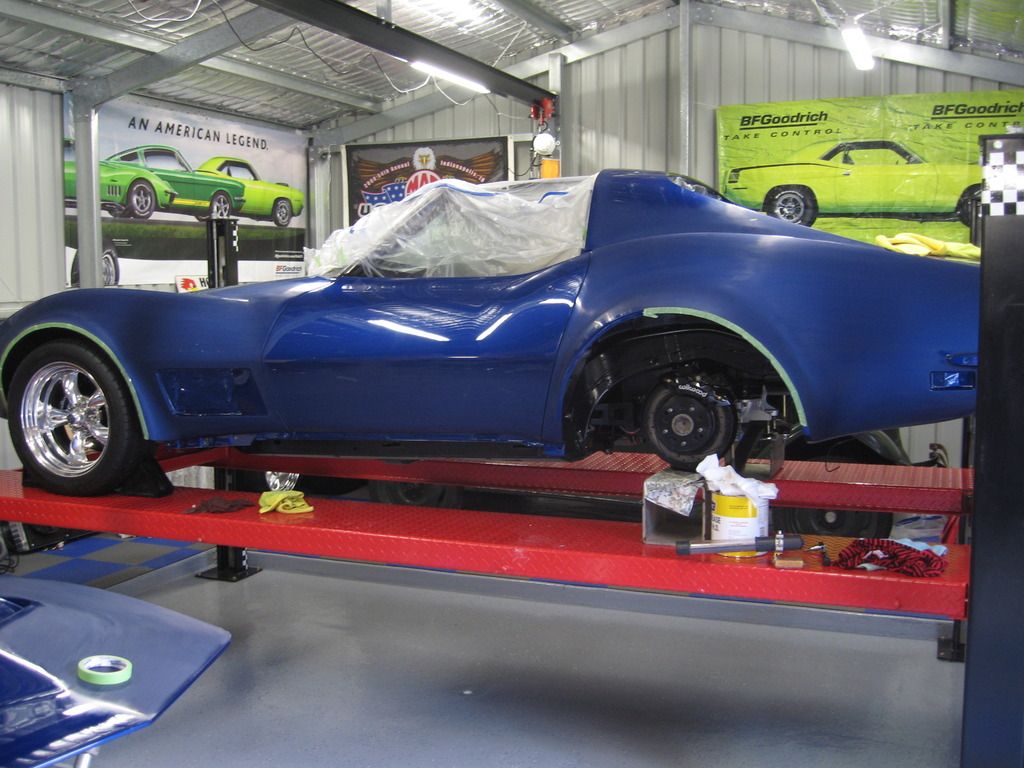
After countless hours colour sanding I have finally got the car sanded down to 2500. I jumped straight up to 2000 from the 800 paper and sanded at 90 degrees to the previous grade so I could see when the 800 scratches where gone. Finished off with 2500 paper also at right angles to the previous 2000 direction. I still need to finish the hood and roof panels but they can wait until my next break, besides I am a bit over sanding for now!!!

I have compounded the top half of the left door to see how it looks. It still needs two more grades of finer polish to finish it off. There are a few small faults but I am going to have to live with them.

Back to work again in a few days so will finish buffing when I get back.

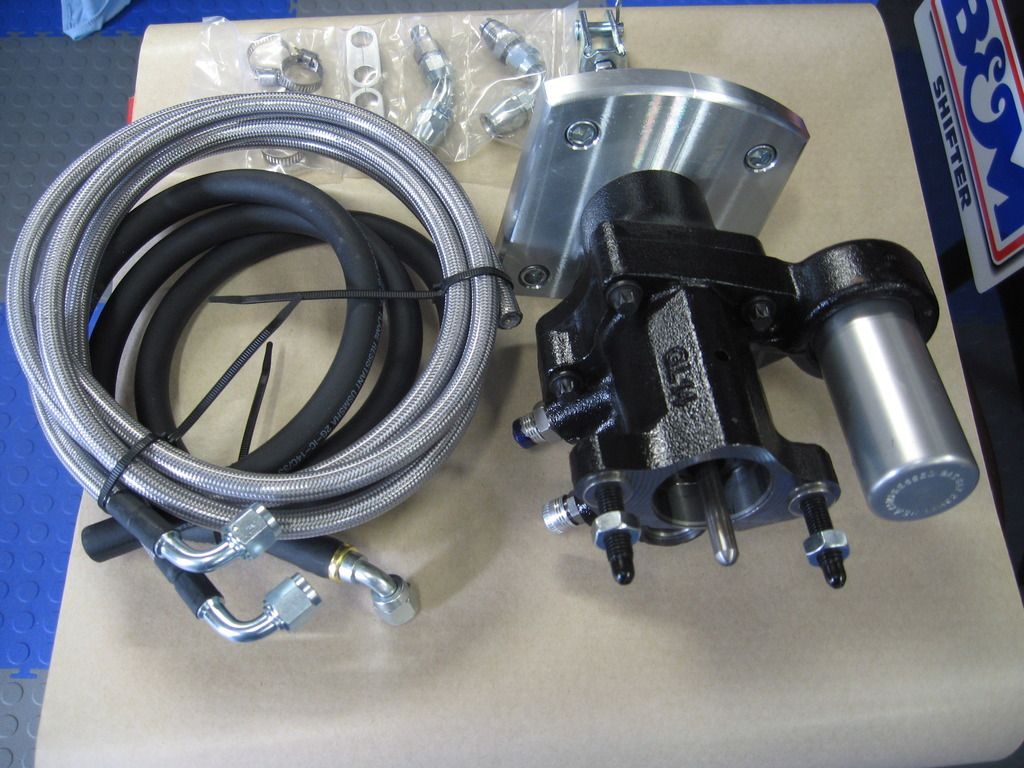
Also figured as the vacuum brake booster will be pretty well useless with the new engine I'll fit a hydroboost unit.
I've had the vacuum booster on and off so many times since I've had this car that what normally would be a sh#t of a job I can do quite easy now.


Offline metalhead

  • Four Barrel
  • ***
  • Posts: 198
  • Black is best...
  • Location: Newcastle, NSW
Re: 71 rebuild
« Reply #524 on: July 25, 2015, 10:02:53 PM »
Looking good!

Offline wabco40

  • Fuel Injected
  • *****
  • Posts: 556
  • Location: Perth
Re: 71 rebuild
« Reply #525 on: August 02, 2015, 05:10:05 PM »
Looking good!

Thanks metalhead. Should be back on the road in the next few months!!!

Offline Scott

  • Tri Powered
  • ****
  • Posts: 419
  • Shed Dweller
  • Location: Gold Coast
Re: 71 rebuild
« Reply #526 on: August 03, 2015, 08:23:53 AM »
I'm still trying to work out how everything stayed so clean while you wet sanded it :)

Offline wabco40

  • Fuel Injected
  • *****
  • Posts: 556
  • Location: Perth
Re: 71 rebuild
« Reply #527 on: August 03, 2015, 05:14:27 PM »
I'm still trying to work out how everything stayed so clean while you wet sanded it :)

I've got some heavy cloth painters drop sheets I lay under the area I am working on. Also any water and sanding residue just runs down into the recessed area under the hoist so it's easy to mop up later  :thumb:

I clean up after each job. Everyone here says I get a bit over the top about keeping my work area clean but I figure it better to keep it under control then let it get out of hand  :cool:

last night shift tonight then back home first thing in the morning. Start buffing this break, that's when it starts to get messy.

Offline Jethro

  • Camo's nemesis
  • Supercharged
  • ******
  • Posts: 1649
  • The Lone Ranger
  • Location: The Gong
  • Car: 1969 Corvette Roadster
Re: 71 rebuild
« Reply #528 on: August 03, 2015, 06:47:38 PM »
I'm with yo BardO , Cleanliness is next to godliness  :thumb: :thumb:

Offline Jethro

  • Camo's nemesis
  • Supercharged
  • ******
  • Posts: 1649
  • The Lone Ranger
  • Location: The Gong
  • Car: 1969 Corvette Roadster
Re: 71 rebuild
« Reply #529 on: August 03, 2015, 06:48:33 PM »
I'm with yo BradO , Cleanliness is next to godliness  :thumb: :thumb:

Offline craigh

  • Four Barrel
  • ***
  • Posts: 195
Re: 71 rebuild
« Reply #530 on: August 03, 2015, 07:19:43 PM »
Progressing well Brad, makes me feel so lazy recently.

Offline wabco40

  • Fuel Injected
  • *****
  • Posts: 556
  • Location: Perth
Re: 71 rebuild
« Reply #531 on: August 03, 2015, 08:58:20 PM »
I'm with yo BardO , Cleanliness is next to godliness  :thumb: :thumb:

Thanks Jethro, makes things a lot easier to work on when it's clean.

Offline wabco40

  • Fuel Injected
  • *****
  • Posts: 556
  • Location: Perth
Re: 71 rebuild
« Reply #532 on: August 03, 2015, 09:04:19 PM »
Progressing well Brad, makes me feel so lazy recently.

Thanks Craig, I wouldn't say that. I can't beleive it's going to be close to 18 months that my car has been off the road.

Offline Jethro

  • Camo's nemesis
  • Supercharged
  • ******
  • Posts: 1649
  • The Lone Ranger
  • Location: The Gong
  • Car: 1969 Corvette Roadster
Re: 71 rebuild
« Reply #533 on: August 03, 2015, 09:05:44 PM »

"Thanks Craig, I wouldn't say that. I can't beleive it's going to be close to 18 months that my car has been off the road."

BradO,

Reminds me of when I was rebuilding my engine  :tears: :tears: :tears: 18 month off the road :therethere:

Offline wabco40

  • Fuel Injected
  • *****
  • Posts: 556
  • Location: Perth
Re: 71 rebuild
« Reply #534 on: August 03, 2015, 09:33:43 PM »
"Thanks Craig, I wouldn't say that. I can't beleive it's going to be close to 18 months that my car has been off the road."

BradO,

Reminds me of when I was rebuilding my engine  :tears: :tears: :tears: 18 month off the road :therethere:

I forgot about your engine issues Jethro.

What I have learnt is, work out how long you think it's going to take and then triple it.

Offline wabco40

  • Fuel Injected
  • *****
  • Posts: 556
  • Location: Perth
Re: 71 rebuild
« Reply #535 on: August 08, 2015, 06:43:12 PM »
Finished compounding and polishing the front clip and doors. There's a few minor issues with the finish but it will have to do. I haven't done the rear clip yet as there is a bit of crap in the clear coat that I need to try sand out first  :grr:

Also still need to finish the hood, roof panels and headlights. I forgot how time consuming all this sanding and buffing is.


Offline sirfixalot

  • Fuel Injected
  • *****
  • Posts: 700
  • Committee Member & Tech Adviser C3-C4
  • Location: Gods Country Sutherland S
Re: 71 rebuild
« Reply #536 on: August 08, 2015, 09:10:24 PM »
Looks damn good to me I would be pretty happy with a paint job like that

Offline wabco40

  • Fuel Injected
  • *****
  • Posts: 556
  • Location: Perth
Re: 71 rebuild
« Reply #537 on: August 08, 2015, 11:27:00 PM »
Looks damn good to me I would be pretty happy with a paint job like that

Thanks Geoff.

I think the problem is when you do everything yourself you get to know every little flaw where if a paint shop did the job you don't get to know about it.

Offline craigh

  • Four Barrel
  • ***
  • Posts: 195
Re: 71 rebuild
« Reply #538 on: August 09, 2015, 07:40:08 AM »
It's always easy to be self critical, but from here it looks amazing.

Offline Jethro

  • Camo's nemesis
  • Supercharged
  • ******
  • Posts: 1649
  • The Lone Ranger
  • Location: The Gong
  • Car: 1969 Corvette Roadster
Re: 71 rebuild
« Reply #539 on: August 09, 2015, 05:33:08 PM »
stop teasing BradO, put this big ass back wheelz on and show us  :toetap: :toetap: