Author Topic: 71 rebuild  (Read 442503 times)

0 Members and 12 Guests are viewing this topic.

Offline wabco40

  • Fuel Injected
  • *****
  • Posts: 556
  • Location: Perth
Re: 71 rebuild
« Reply #400 on: September 13, 2014, 06:42:49 PM »
I have made a bit more progress over the last few days.

The clutch master cylinder is mounted and pushrod adjusted. Its a bit hard to see in the picture but the reservoir is mounted beside the brake m/c.


I have removed all the factory gauges from the centre cluster and fitted Autometer gauges. I picked up another gauge backing plate and clearance it to suit the new gauges, this way I still retain the seat belt, headlight and door ajar lights.
I also removed the original radio and replaced it with a Retro Sound unit. Its a lot easier to fit the gauge cluster and console back in with this unit then the original radio.


The mess behind the right dash pad. I wired in a GM knock sensor module to the ECU.


Offline Jethro

  • Camo's nemesis
  • Supercharged
  • ******
  • Posts: 1649
  • The Lone Ranger
  • Location: The Gong
  • Car: 1969 Corvette Roadster
Re: 71 rebuild
« Reply #401 on: September 13, 2014, 11:31:50 PM »
Brad, those Autometer gauges your fitted to centre cluster look like they where meant to be there   :thumb:

Offline wabco40

  • Fuel Injected
  • *****
  • Posts: 556
  • Location: Perth
Re: 71 rebuild
« Reply #402 on: September 14, 2014, 07:27:17 PM »
Brad, those Autometer gauges your fitted to centre cluster look like they where meant to be there   :thumb:

Thanks Jethro,

I figured they would have to be more accurate then the 44 year old originals. The 2 1/16" diameter gauges fit well in the centre cluster.

I started to remove the diff today (to do a ratio change) but only got as far as unbolting the half shafts. I am back to work on Tuesday for another week so will have to wait until then.

Offline craigh

  • Four Barrel
  • ***
  • Posts: 195
Re: 71 rebuild
« Reply #403 on: September 15, 2014, 04:21:02 AM »
The backing plate work looks like OEM Brad.

Did you just cut and grind the backplate down then mount your new stuff.

Offline wabco40

  • Fuel Injected
  • *****
  • Posts: 556
  • Location: Perth
Re: 71 rebuild
« Reply #404 on: September 15, 2014, 06:51:21 AM »
The backing plate work looks like OEM Brad.

Did you just cut and grind the backplate down then mount your new stuff.

Hi Craig,

The original gauges are bolted to the backing plate, they where also grounded there.
The new gauges are much deeper so I just cut out the area where the original gauges mounted to and retained the area where the light sockets and seat belt board fit.
The seat belt light and reset button gets its power from the original fuel gauge and was grounded on the backing plate. I had to wire it to a switched 12v source and grounded it back to the console ground point.


Offline wabco40

  • Fuel Injected
  • *****
  • Posts: 556
  • Location: Perth
Re: 71 rebuild
« Reply #405 on: September 15, 2014, 04:12:21 PM »
I decided to finish pulling the diff this morning. The job took less then an hour from start to completely out.
It helped using a hoist and having previously fitted new bushes in the diff cross member.

I have got WA Diff Centre to fit the new crown wheel and pinion. I'll fit it back in when I return from work next week.


Offline wabco40

  • Fuel Injected
  • *****
  • Posts: 556
  • Location: Perth
Re: 71 rebuild
« Reply #406 on: September 27, 2014, 11:53:15 AM »
The old 3.36 gears out and new 3.90 fitted.


The diff back in and all buttoned up.


Offline Jethro

  • Camo's nemesis
  • Supercharged
  • ******
  • Posts: 1649
  • The Lone Ranger
  • Location: The Gong
  • Car: 1969 Corvette Roadster
Re: 71 rebuild
« Reply #407 on: September 27, 2014, 03:31:07 PM »
Brad, what  Penrite product did you use ?

Offline bfit

  • Don't talk of dust and roses
  • Global Moderator
  • Supercharged
  • *****
  • Posts: 2879
  • Two one thousands
  • Location: NSW
  • Mood: Honey reinforced
  • Car: Yes
Re: 71 rebuild
« Reply #408 on: September 27, 2014, 04:24:55 PM »
Brad
The 3.9s will,give you better acceleration
I'm running 4.11 lots of go and lot of rubber burning is your nott careful. 
Bfit
I have seen too many instances where people continue to pursue wrong courses of action because they do not take the time to think critically about what has happened in the past.’’
Winston Churchill

Offline wabco40

  • Fuel Injected
  • *****
  • Posts: 556
  • Location: Perth
Re: 71 rebuild
« Reply #409 on: September 27, 2014, 06:07:16 PM »
Brad, what  Penrite product did you use ?

Jethro, I used their 80w-90 gear oil.
I also purchased their limslip additive. I didn't know until I got the oil home that it already had the correct dosage of additive in the gear oil, so I didn't end up using the limslip.
The diff takes about 2 litres.

http://www.penriteoil.com.au/pis_pdfs/GEAR%20OIL%2080W-90%20AUGUST%202013.pdf

Offline Jethro

  • Camo's nemesis
  • Supercharged
  • ******
  • Posts: 1649
  • The Lone Ranger
  • Location: The Gong
  • Car: 1969 Corvette Roadster
Re: 71 rebuild
« Reply #410 on: September 27, 2014, 06:13:57 PM »
Thanks Brad  :thumb:

Offline wabco40

  • Fuel Injected
  • *****
  • Posts: 556
  • Location: Perth
Re: 71 rebuild
« Reply #411 on: September 27, 2014, 06:15:16 PM »
Brad
The 3.9s will,give you better acceleration
I'm running 4.11 lots of go and lot of rubber burning is your bot careful. 
Bfit

Hi Bob,
I didn't like the 3.36 with a wide ratio Muncie. I am hoping the 3.9's will workout well with a 2.66 first gear, close ratio box and 0.68 overdrive.

Offline wabco40

  • Fuel Injected
  • *****
  • Posts: 556
  • Location: Perth
Re: 71 rebuild
« Reply #412 on: September 27, 2014, 06:16:09 PM »

Offline bfit

  • Don't talk of dust and roses
  • Global Moderator
  • Supercharged
  • *****
  • Posts: 2879
  • Two one thousands
  • Location: NSW
  • Mood: Honey reinforced
  • Car: Yes
Re: 71 rebuild
« Reply #413 on: September 27, 2014, 06:29:18 PM »
I think you will like the 3.9
 When I change  to a 9" I'm going 3.9
4.11 are good for 115 in my set up, in direct, (4th) its a little slow for the 1/4 pulling 5th gear is not good for trap times
Need about 135 in 4th
Bit

I have seen too many instances where people continue to pursue wrong courses of action because they do not take the time to think critically about what has happened in the past.’’
Winston Churchill

Offline wabco40

  • Fuel Injected
  • *****
  • Posts: 556
  • Location: Perth
Re: 71 rebuild
« Reply #414 on: October 10, 2014, 02:05:50 PM »
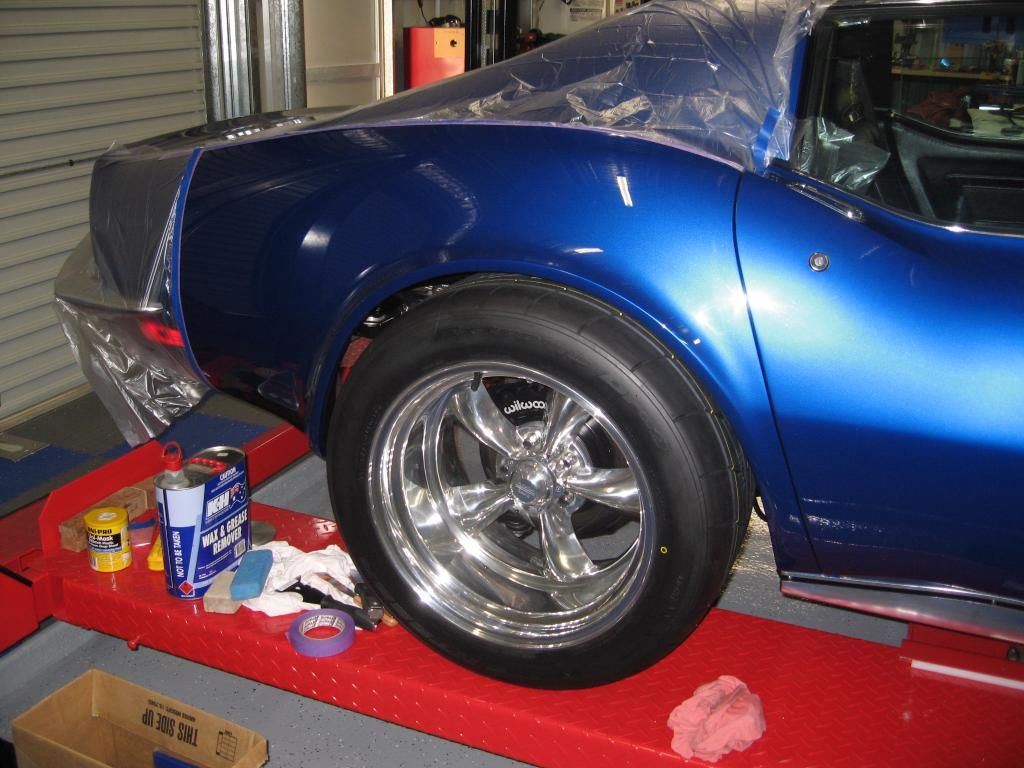
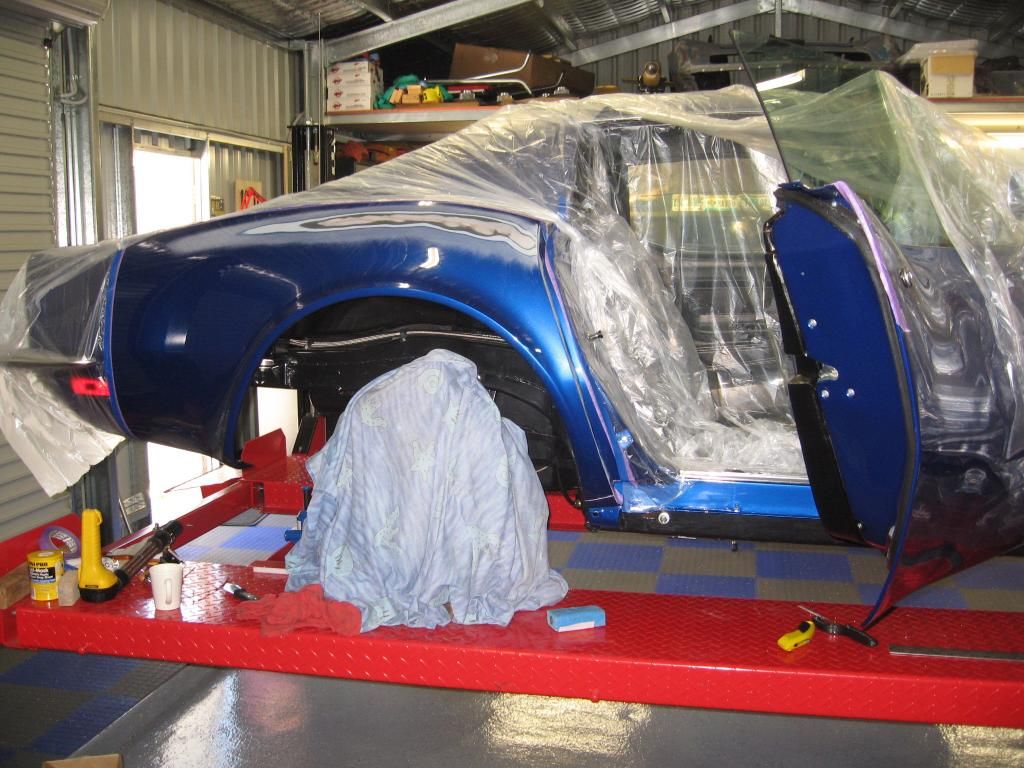
I've passed the point of no return and started to removed one of the rear fenders.

I am not in any hurry so just doing a bit at a time.

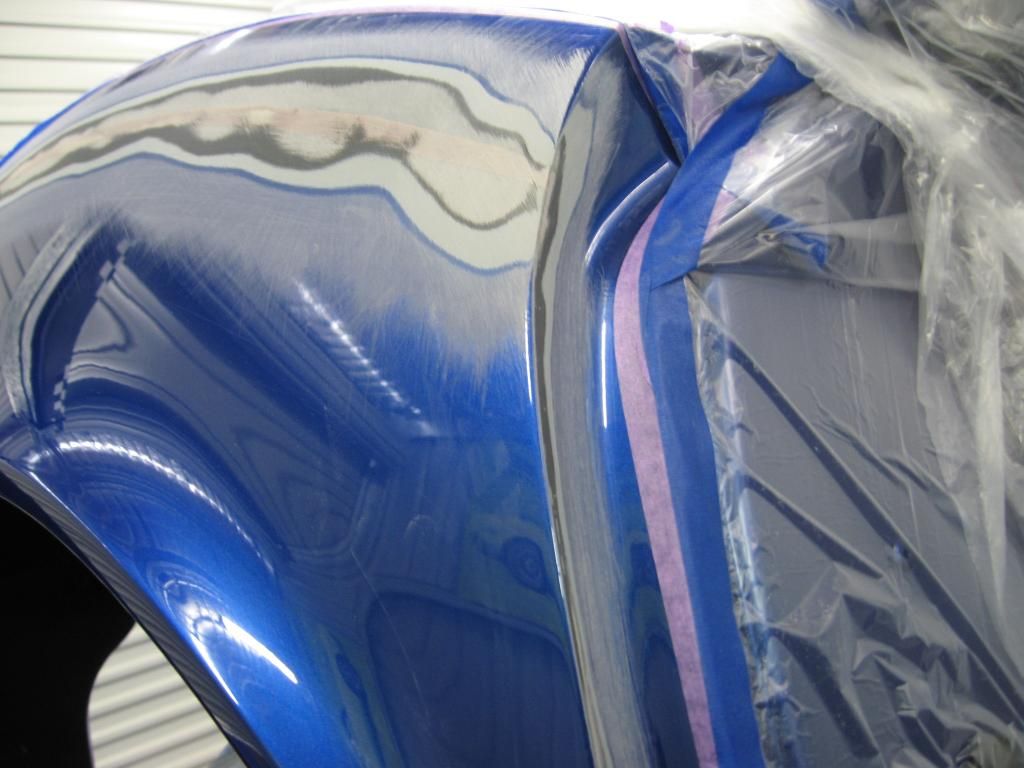
First de-waxed the seam area and then blocked out with 80 grit to exposed the filler between the panels.
 
I am thinking about cutting the fender off about 2-3 inches in front of the side marker light instead of removing the complete fender.
It will save a lot of work and should only require a bonding strip between the existing and new rear fender sections.
I'll see how it looks after I finish cutting the original fender out.

Its easy to see the layers of paint from my previous work. Top to bottom consists of, clear coat, blue base, grey primer, black epoxy sealer and bare glass. The pink strip is the original filler between the fender and top panel.


Offline Jethro

  • Camo's nemesis
  • Supercharged
  • ******
  • Posts: 1649
  • The Lone Ranger
  • Location: The Gong
  • Car: 1969 Corvette Roadster
Re: 71 rebuild
« Reply #415 on: October 11, 2014, 10:20:57 AM »
Brad,

Reminds me of when I went to fit some new torpedo rod holders to my new boat....... Mrs come into the shed and seen me just standing there with the drill in my hands boat was all marked out and ready for drilling a pilot hole said what are you doing Jethro?????

I just couldn't bring myself to drilling the fooken new thing :tears: :tears: never did fit those rod holders to the bow of our boat  :laugh: :laugh:

Offline wabco40

  • Fuel Injected
  • *****
  • Posts: 556
  • Location: Perth
Re: 71 rebuild
« Reply #416 on: October 11, 2014, 07:12:33 PM »
Brad,

Reminds me of when I went to fit some new torpedo rod holders to my new boat....... Mrs come into the shed and seen me just standing there with the drill in my hands boat was all marked out and ready for drilling a pilot hole said what are you doing Jethro?????

I just couldn't bring myself to drilling the fooken new thing :tears: :tears: never did fit those rod holders to the bow of our boat  :laugh: :laugh:

That first cut is a bit daunting Jethro :omg:, after that its ok.

Started to cut the right panel out this arvo. I didn't want to damage the bonding strips and if possible save the original fenders.

A bit of gentle heat with a heat gun along the seam and then heat up the blade of a flexible paint scraper and it cuts through the factory adhesive quite easily.
I have separated the fender up to where I am going to cut it off in front of the side marker light.
Once the fender is off then the excess bonding adhesive will be cleaned up off the bonding strips and the new fender trimmed to fit.


Offline craigh

  • Four Barrel
  • ***
  • Posts: 195
Re: 71 rebuild
« Reply #417 on: October 11, 2014, 11:00:52 PM »
Your a brave man Brad. !!

Offline wabco40

  • Fuel Injected
  • *****
  • Posts: 556
  • Location: Perth
Re: 71 rebuild
« Reply #418 on: October 12, 2014, 07:25:43 PM »
Your a brave man Brad. !!

Its not that drastic Craig, this is only minor surgery compared to what I have done previously to this car.

The right fender is removed. I still need to clean up the old adhesive off the bonding areas and make up a bonding strip where I am going to splice the new fender onto the existing section in front of the side light.

When CIC made up the moulds for these flairs they made the wheel opening more round and centralised the wheel in the arch.
 
The original rear fenders always looks like the wheel is to far forward in the opening. It seems to be more noticeable when the car is lowered.

Back to work for another week. I'll remove the left fender when I return and start trimming the new fenders to fit.


Offline wabco40

  • Fuel Injected
  • *****
  • Posts: 556
  • Location: Perth
Re: 71 rebuild
« Reply #419 on: October 13, 2014, 02:49:33 PM »
Rough fit to see how it looks. Fender still needs to be centred and trimmed.

I stuffed up on the backspace for the new rims :grr:. I previously had 5.25" BS but had these made up with 4.75".

I should have stayed with 5.25". Looks like I am gona have two rims for sale.