Author Topic: The DEMONX 1970 vert project  (Read 66773 times)

0 Members and 2 Guests are viewing this topic.

Offline demonx

  • Fuel Injected
  • *****
  • Posts: 722
The DEMONX 1970 vert project
« on: July 26, 2008, 04:52:08 PM »
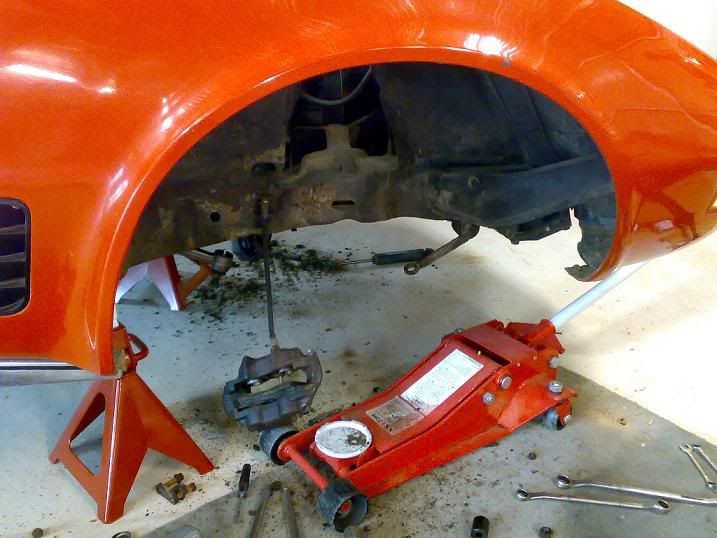
Anyone who has done this before knows I had a crap day today!

Bought from Willcox a front and rear end suspension rebuild kit as well as picking up some Billstein shocks for all corners from somewhere else.

So far I've replaced all the steering pieces of the kit, removed all the upper and lower A arms but I hit a brick wall when I couldn't remove the wishbone bushes without a press.

Going to take them and get them pressed out and the new ones in on Monday/Tuesday.
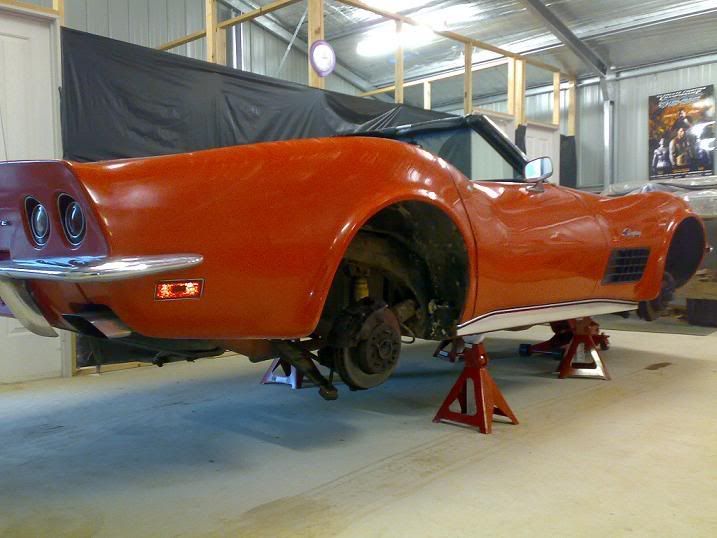


Other than the under body work, I've been pottering around replacing actuators and trying to get the vacuum up to scratch.

I also removed the nose and petrol cap badges, scrubbed them back with steel wool to get the grime off, repainted the detail of the flags etc with hobby enamel (2 coats) After that had cured I mixed up an epoxy to provide the badges with a high gloss and long term protection. They look great but i forgot to take pics - next time I visit the shed.

Been lubing up all the stuff that's stuck, making things work that haven't worked for years. All the usual stuff with an old car.


Offline 72vet

  • Supercharged
  • ******
  • Posts: 1676
The DEMONX 1970 vert project
« Reply #1 on: July 26, 2008, 06:20:04 PM »
Demonx

Are you going to clean up the inner guards & Rails while you have the front & rear in bits  ?
CLICK ME to see my albums.

Offline demonx

  • Fuel Injected
  • *****
  • Posts: 722
The DEMONX 1970 vert project
« Reply #2 on: July 26, 2008, 07:09:43 PM »
I wasn't going to go to too much trouble with them. I'm more concerned about getting the care mechanically perfect and worried about the cosmetics later on.

Just a basic wire brush scrub. Not too worried about painting them. They don't really get seen and it all looks pretty clean. No rust or damage to report other than the obvious surface rust which you'll find on any car..

All four wheel arches are already painted all round with sound deadener. It just needs to be hosed to clean it up a bit.

Offline Cameron 77C3

  • Supercharged
  • ******
  • Posts: 2554
  • I use to live here
    • http://xtremecarzone.com.au/
The DEMONX 1970 vert project
« Reply #3 on: July 27, 2008, 01:41:05 AM »
That aint a fun job.  You got your work cut out for you.  You will be doing some swearing now but will soon forget about that once it's back on the road.  The handling will be so much better.

Keep us in the loop.
To see my picture galleryCLICK ME
 
Never underestimate PRISCILLA queen of the vette's
www.xcz.com.au

Offline demonx

  • Fuel Injected
  • *****
  • Posts: 722
The DEMONX 1970 vert project
« Reply #4 on: July 27, 2008, 08:08:28 AM »
As I can't do too much more on the front end until I get the wishbone bushes pressed I'll be moving onto the rear today.

Will take some more pics If I get it stripped. I am so not looking forward to the rear trailing arm bushes. Getting that out I reckon will suck but it has to be easier than the front control arm bushes!

I'm just damn lucky my father inlaw is helping me with all this. He's a retired mechanic and so far he's been invaluable. I'm by no means a mechanic and he's done this crap his whole life. Makes a big difference!

Offline Scott

  • Tri Powered
  • ****
  • Posts: 419
  • Shed Dweller
  • Location: Gold Coast
The DEMONX 1970 vert project
« Reply #5 on: July 28, 2008, 10:01:25 PM »
I hope the rear trail arms don't give you much trouble.  I used a hacksaw blade with a small holder and a few beers to cut through the bolts.  Took a bit over two beers for each cut, with the shims removed.  I couldn't remove the inside shims though, so I bought a cheap reciprocating saw from bunnings, and a couple of good bi-metal blades and used lots of inox to keep the blades from overheating.  Still took a while.  Definitely not the most fun job around.

Offline demonx

  • Fuel Injected
  • *****
  • Posts: 722
The DEMONX 1970 vert project
« Reply #6 on: July 29, 2008, 06:32:17 AM »
Thanks for the advice... I'll be getting round to that next weekend. Something to look forward to!

I haven't finished putting together the front end yet. Just bought some wheel bearing kits yesterday and some new bump stops etc. Also tracked down some new spring washers for the wishbone nuts as they had disappeared. I'll get all that together, reco the front callipers and add new calliper kits - then move onto the rear end.


Offline Reklaw

  • Four Barrel
  • ***
  • Posts: 189
The DEMONX 1970 vert project
« Reply #7 on: July 29, 2008, 09:15:11 AM »
Not sure if you are resigned to having to cut the rear trailing arm bolts off with a hacksaw. I have only done two of these, both times the nuts came off OK. I just pushed the bolts back as far as required to remove the trailing arm, without completely removing the bolts. The biggest problem I had was the caliper bolts. I guess that 30 odd years of hot & cold had caused them them to sieze in place.
Bob Walker
Long Jetty

Offline Scott

  • Tri Powered
  • ****
  • Posts: 419
  • Shed Dweller
  • Location: Gold Coast
The DEMONX 1970 vert project
« Reply #8 on: July 29, 2008, 01:04:05 PM »
I really hope the nuts come off and the bolts slide out.  I could get the nuts off, and using a slide hammer I managed to remove the outside shims on each side after a lot of noise, but the inside shims didn't budge a bit.  The bolts were stuck pretty good as well.  One of my training arms still has the bolt shank firmly stuck in the bush.  The 20 ton press wouldn't budge it.  I guess I was just lucky ;39  Everything else on the rear was OK, apart from the hard brake line, which won't come loose from the block it screws into.

Offline GoldDigger

  • Two Barrel
  • **
  • Posts: 22
The DEMONX 1970 vert project
« Reply #9 on: July 31, 2008, 08:37:59 PM »
It seems a shame not to do all the little things while you have it apart, seeing it is such a nice car
Long live C3 chromies. Hope yours does not turn out to be a major resto like mine became.

Offline gtc

  • Supercharged
  • ******
  • Posts: 1466
  • Car: 1970 454 Manual
The DEMONX 1970 vert project
« Reply #10 on: July 31, 2008, 09:10:12 PM »
Quote
Originally posted by GoldDigger
Long live C3 chromies.


Indeed! ;27
It's C3 chromie for me, see? Si!

Offline nifty

  • Fuel Injected
  • *****
  • Posts: 842
The DEMONX 1970 vert project
« Reply #11 on: July 31, 2008, 10:21:23 PM »
i agree....i good scrub and a fresh coat of black in the ineer gaurds will bring them to life....

Offline demonx

  • Fuel Injected
  • *****
  • Posts: 722
The DEMONX 1970 vert project
« Reply #12 on: August 01, 2008, 05:50:10 PM »
Here's pics of todays efforts...

Installed new wheel bearing kits.
Installed the new shocks (harder job than it should have been - had to jack the bastards up!)
Reconditioned the callipers and then painted with 3 coats calliper paint

Before:


After cleaning back with a brass wire wheel in a drill:


Waiting for full cure - will install tomorrow:


Offline gtc

  • Supercharged
  • ******
  • Posts: 1466
  • Car: 1970 454 Manual
The DEMONX 1970 vert project
« Reply #13 on: August 01, 2008, 08:10:43 PM »
Demonx you have U2U
It's C3 chromie for me, see? Si!

Offline Cameron 77C3

  • Supercharged
  • ******
  • Posts: 2554
  • I use to live here
    • http://xtremecarzone.com.au/
The DEMONX 1970 vert project
« Reply #14 on: August 02, 2008, 08:35:19 AM »
Looking good.  What colour is that you have used on the calipers?
To see my picture galleryCLICK ME
 
Never underestimate PRISCILLA queen of the vette's
www.xcz.com.au

Offline demonx

  • Fuel Injected
  • *****
  • Posts: 722
The DEMONX 1970 vert project
« Reply #15 on: August 02, 2008, 09:06:12 AM »
Quote
Originally posted by Cameron 77C3
Looking good.  What colour is that you have used on the calipers?


Its just gloss black Calliper paint. I'll take pics later once they're mounted.

Going to start dismantling the rear end today...

Offline demonx

  • Fuel Injected
  • *****
  • Posts: 722
The DEMONX 1970 vert project
« Reply #16 on: August 02, 2008, 05:05:22 PM »
This was a moment that really p#issed me off. I mounted both the front rotors and calipers etc. Both sides. Then noticed I'd installed the rear rotors by mistake... Pull it all off, start again.


Here's the back end in the middle of the stripping down process. Who said back ends are easier? ;29

Offline demonx

  • Fuel Injected
  • *****
  • Posts: 722
The DEMONX 1970 vert project
« Reply #17 on: August 03, 2008, 05:23:42 PM »
Due to peer group pressure (my brother was bagging me out yesterday for being slack) I decided to clean up the front end a bit more and paint it all.

I have a pair of A Arm seals coming as both are a bit ratty as you can tell from the pic... You'll also notice I've got the front rotors fitted this time!


Came up pretty good I must say. Looks better in person than the pic.


Offline GoldDigger

  • Two Barrel
  • **
  • Posts: 22
The DEMONX 1970 vert project
« Reply #18 on: August 03, 2008, 09:04:52 PM »
Parking brakes on the front wheels.  Mmmm.  That would make for some interesting quick turns.  Maybe you have stumbled onto someting here demonx.  Pleased you are giving the beast all your TLC.. It makes a difference when something you will never see again is looking great!!
Keep the pics & updates coming. Great stuff.

Offline gtc

  • Supercharged
  • ******
  • Posts: 1466
  • Car: 1970 454 Manual
The DEMONX 1970 vert project
« Reply #19 on: August 03, 2008, 10:06:06 PM »
Quote
Originally posted by GoldDigger
Parking brakes on the front wheels.  Mmmm.  


Could only be an improvement as they don't work on the rear wheels. :24
It's C3 chromie for me, see? Si!